
I finally found time to build a cover for a radiator in our dining room, the room with the sloping floor.
My original plan was to build a freestanding piece of furniture that would be placed over the radiator. Or really, it would be placed around the radiator: a box without a back — three sides and a top — that could be slid into place to surround the radiator.
But because my floor is sloped and warped, and because the walls are not square (sound familiar?), the box — sitting on the crooked floor leaning away from this wall and toward the other — would have put a spotlight on the fact that 90-degree angles are in terribly short supply in my old building.

I wasn’t sure what I was going to do to end up with a cover that appeared level and straight regardless of the floor it was sitting on. But when has the unknown ever stopped a Passionate Chump? I figured out how to deal with this situation during construction.
I will write a few posts to talk about other aspects of this project, such as how I learned tinsmithing in a hurry (!). For this post I’m focusing on this sloping floor issue. Here’s what I did.
(This post may contain affiliate links. Check out our affiliate disclosure for more info.)
A top down plan
I planned this project from the top down. Since the floor was sloping in all kinds of directions every corner had a different height. I thought, if I can get the top of the cover level on the wall above the radiator then I can figure out the side and front measurements. This turned out to be a great way to go.
Find something – anything – level
Holding a level against the wall behind the radiator, with the top of the level about 2” above the top of the radiator, I drew a level line across the wall.

I admit that my first swing at this project had me building a cover that was a few inches too tall. I was worried about houseplants placed on the cover getting too hot and so I cranked up the overall height. Then I tested the cover in place and it felt huge and awkward — too much radiator cover for the space. This mistake was actually serendipitous. All will be revealed in a sec!
To figure out measurements for the front and sides of the cover I took a 1” x 4” x ~24” scrap board and lined up the 4” side with the line on the wall. I took measurements from the bottom of the board to the floor on the right and the left sides of the radiator. These measurements give me the required maximum height of the front cover.

Get comfortable with uncertainty
I was still a bit fuzzy on what I was shooting for with this project. Would the cover have one side firmly on the floor and the other side propped up on shims. Or both sides on adjustable metal feet? Not clear. Not the best place to build from, but a Passionate Chump doesn’t let a little uncertainty stop progress!
Let the building begin
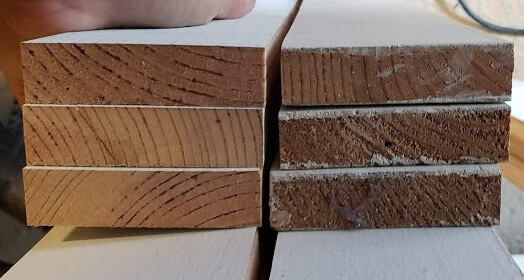
I had a stack of old painted pine boards salvaged over the years from pantries and linen closets in the apartments in my building. We wanted the radiator cover to be white with a poplar wood top (to match the dining room table) so I decided to use this “pre-primed” lumber. Enter my fabulous DeWalt portable table saw — . I milled a few choice pieces down to size — 3” wide slats and 4” wide end pieces. I then used my chop saw to cut to length and clean up the gnarly ends.
Repurposed wood: old pantry boards become a new radiator cover. Bonus: the worn look of the boards create an instant “vintage” feel and match the existing old moulding and trim in the space.
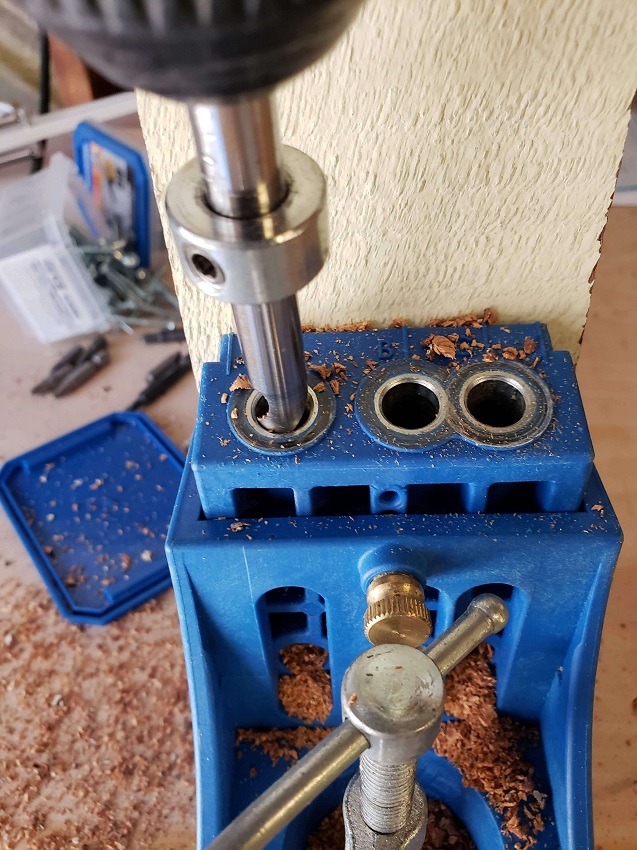
With the wood milled down, I was ready to construct the front. Enter my Kreg Jig —
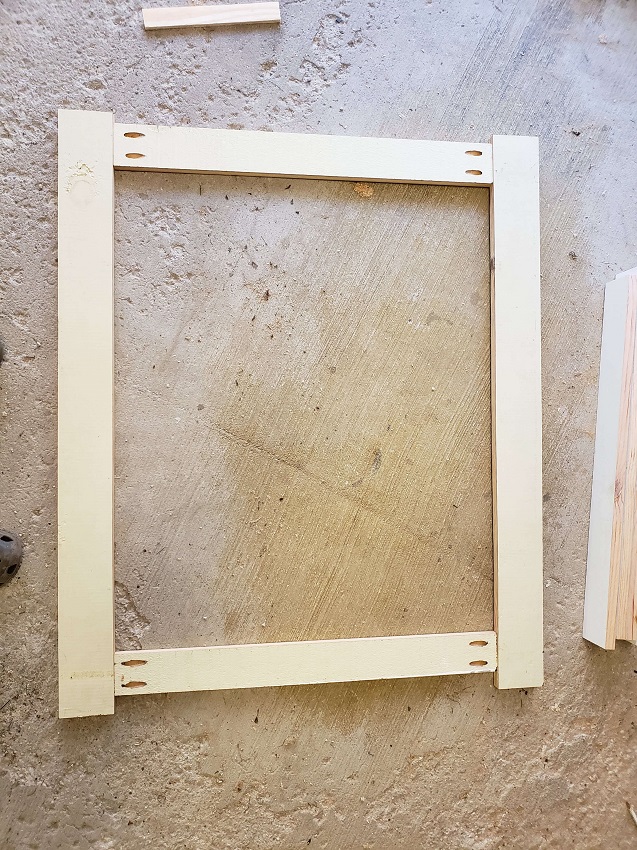

With the front piece constructed it’s time to figure out what the *&%$ to do next. I placed the front cover in front of the radiator and then used shims under the left side of it to make it level.
![]()
Finally: an a-ha moment
Assessing the front piece in place, it became clear that the best solution for my situation, one that would mask the sloping floor and cover up the beat down floor boards around the radiator as much as possible, was to cut the front piece at an angle along the bottom so that this piece fit tight to the floor. This would let me cover up all of that beat down flooring plus hide the fact that the floor is, ahem, not the levelest. Here’s where serendipity comes in: as I mentioned, the front piece I made was too high and so I had plenty to work with in figuring out this cut.
It’s easiest to show what to do next with some drawings.
![]()
Here’s my too-high front piece:

I took a straight piece of scrap wood and lay it on the floor along the bottom of the front piece.

Using the top of the board as my guide I scribed the slope of the floor onto this front piece.
 Almost there. Now I just need to figure out the final height for the front piece so that the cut down front piece fits snugly under the top piece and hugs the sloped floor. I determined that I wanted a 2” clearance between the radiator and the bottom of the top piece of the cover. Knowing that let me figure out that the length I needed to shoot for on the left side of the cover was 40”.
 Next, I measured the space between the 40” mark and the sloped line. That turned out to be 1/2”.

Next I redrew the sloped line 1/2” above the one I scribed earlier. I followed along the sloped line, marking 1/2” above it every 10” or so, and then used these new marks to draw a new sloped line exactly where I needed to make this sloped cut. I was sure to remove the couple of pocket hole screws that could be in the circular saw’s path before making this cut.

Here’s the final front piece with angled cut. Check out the bottom of the cover; it does slope downward. Noticeable to us here because we worked so hard to make this sloped cut! Most folks won’t notice this at all.